vrijdag 1 januari 2016
Heb ik dit wel nodig?
Deze blog, InspirIng, heb ik die wel nodig? Ik heb een FB-pagina die over dezelfde dingen gaat, Ingidee, nog een FB-pagina over een permacultuur-project, CuraDura (en daarvan ook een blog) en natuurlijk mijn persoonlijke FB-tijdlijn en een Google-profiel. En dan heb ik ook nog twee websites, die op Exto over kunst en die op Weebly over van alles .. Die beide websites bieden ook te mogelijkheid om blogs te schrijven. Dat doe ik ook, op m'n Weebly-website.
Nee, het is teveel! Er moet iets afvallen. Waarschijnlijk wordt dat deze blog hier.
Denk jij daar anders over? Geef hier dan een reactie met jouw goede raad!
dinsdag 29 december 2015
Ingidee, alles anders
Ik ga mijn blog maar anders doen. Toch maar in het Nederlands. Veel ruimer dan alleen tekenen en schilderen. Net als mijn Facebook-pagina Ingidee. Alles wat me bezighoudt, vooral op creatief gebied. Als ik steeds een kort stukje schrijf, dan kan dat vaker ...
Je ziet hier een tas, gehaakt van plastic tasjes. Plastic tasjes gaan zeldzaam worden ... dat is goed! Dan waaien ze tenminste niet meer door de straten.
maandag 8 juni 2015
fighting the slugs
In my Garden Journal: start of the herb spiral
A
herb spiral in my garden was what I wanted. I knew about the
principles of permaculture, for years. It was about time to put them
into practice. The spot once was a small terrace. Some years before I
took the hexagon-shaped bricks out, piled them along the edge. In new
soil I tried to grow pumpkins there. I should be aware this spot had
a problem: slugs! They ate every young pumpkin plant in there!
I
thought to know better: the slugs ate the pumpkins, but they wouldn't
like herbs. They never ate the rosemary, sage and chives. Now I know
those are plants they do not like. But that isn't the same for all
herbs ... or the vegetables I was planning to grow there too.
Map / design of the herb spiral
So
I had a spiral in mind. The hexagon bricks were right for shaping it.
In the middle it had to be a little higher. First the soil had to be
prepared. Late 2014 I started. A cardboard box, filled with cotton
rags, soil over it, made the middle part higher. I covered the ground
with cardboard. Bricks prevented it from being blown away by the
wind. And so it rested for some months.
We
would leave for six weeks, from mid February. Early February I went
on with the preparations. The cardboard, already soaked wet, was torn
to pieces. I put over a layer of soil and autumn leaves. Leaves of
planes and willows were easy to find in the neighbourhood. I shaped
the spiral neatly, rising to the middle from one to three layers of
stones. Now it had to wait until we'ld return from the trip.
It
was the start of April. Time to sow seeds. I sowed some different
herbs, marigolds, beans and peas. At the market I saw cabbage and
lettuce plants for sale. I bought some cabbage and planted it at
different spots in the garden. I did not buy lettuce, thinking it
would be 'slug fodder'. I found out all too quick also cabbage is
fodder for the slugs! OK, no cabbage in the spiral then. Let's see
how the seeds grow. Yes, I saw something green coming ... Happy I
portrayed the little seedlings in my Garden Journal. Some days later
they were nowhere to find. Only slug traces ...
The first seedlings in my Garden Journal
I
had to do some research on permaculture ways for fighting slugs. I
asked at some forums and Facebook: which are plants slugs hate? I
thought to put such plants alongside and inbetween the herbs, and
then the sluggs would stay away. Good thinking, but alas ... such
plants do not exist! There are plants slugs do not like to eat:
onions and alike, rosemary and wormwood. But to use them to get the
slugs out, you have to plant three rows of them closely together
around your spiral. So someone from England told me.
Drawing and description of the slug
I
got more advices on slugs. Most people told about coffeeground. I put
a layer of that stuff around some cabbage plants in other parts of
the garden. Now I have one cabbage left (because of the coffee, or
was it a better part of the garden?). A little bit of coffeeground is
not sufficient, it has to be a thick layer in a circle around a
plant. Crumbled egg shells, suggested by some, did not work. I even
saw slugs nibbling at the egg shells.
The last cabbage plant in my Garden Journal
Another
advice I got: nematodes. Nematodes are like very small worms living
in slugs. If a slug has too many of it, it dies. It's easy to grow
nematodes. First you catch slugs daily, as much as possible. You put
them in a bucket with a lid, with a little water and plants they eat.
Then one day you see all slugs are dead. Then you fill up with water,
stir and sieve it in a watering-can. Pour it all over your garden.
This water contains so many nematodes, they will soon kill all slugs.
It seemed to work. At least the amount of slugs was diminished very
much after this process. Or was it because of catching the slugs
daily?
June
started, more sun, dryer. Not often I discovered a slug. I had some
nicely grown plants in containers. I thought time to plant them was
now ... You guess it: next morning they were damaged again! Even if
there is only one slug, it can damage all plants in one night. The
slug picks out the tasty green point in the middle. That's the point
from where the plants grows. Without that, it's lost!
Some plants around an 'olla' in my Garden Journal
Now
the conclusion. First: start doing research long before you start
your herb spiral. Study the history of the spot, the soil, the plants
and shrubs growing there (now and before). Read (or re-read) all
there is to know about permaculture before you even start your
preparations. Second: wait until everything is in balance before
planting any vulnerable vegetables. In the first year there is
definitely no balance, probably that will take a few years.
How
could I do better? I should have prepared the spiral and planted it
all with slug-resistant herbs. Think rosemary, sage, mint, wormwood,
garlic, chives. After some years, when it's clearly in balance, I can
start experimenting other species. So: no more vegetable plants this
year! Now onions, potatoes, mint (that's like weed) and still one
pea-plant are growing there. The empty places I can fill with
rosemary and sage. And I'll have patience!
A different view on the herb spiral
zaterdag 11 april 2015
Plein Air Curaçao 2015
I am totally addicted
to Plein Air painting now! I was at the Caribbean island of Curaçao for some
weeks. February 27th to March 7th I joined the Plein Air
Curaçao Festival. This festival is there every two years. Yes, I was there two
years ago too. But this time was even better!
the yellow house of Fleur de Marie
It’s so nice to be
with a group of artists together, doing what you like most: painting. You all
paint the same view, but everyone does it in his or her own way. Your styles
are different and you use different materials. The materials we used were: oil,
acrylics, watercolours and pastel. This time I wasn’t the only watercolourist.
view from Klein Santa Martha
Some of the artists
are used to visit Plein Air events, mostly in the USA. Others are studio
painters, not used to the way of ‘plein air’. The advanced plein air painters
know how to work fast, to finish their painting in about two hours. For others
that is difficult. But we learn from each other.
view from the boat at Fuik
After the festival was
over, I stayed at Curaçao for some more weeks. I did some more painting.
Because then the Plein Air Galley was closed, I made them having in mind
selling at an art fair in the Netherlands. I did my best to make some ‘nice
tropical watercolours’.
bird's cage in the garden
Now I’m back in the
Netherlands, I want to go on painting ‘plein air’. But usually the weather here
is not so nice. Often it rains, you can’t go sit outdoors whenever you want. I
was so happy we had some really nice spring days last week! So I painted my own
neighbourhood using the paint that was still on my palette from Curaçao!
my neighbourhood in Meppel (the Netherlands)
donderdag 29 januari 2015
ARTticle 'Art and Culture' *
It seems there is a connection between culture and art. Often these two
words are used together. But what’s the meaning of ‘culture’?
The word ‘culture’ has its origins in the Latin word ‘colere’, meaning
‘plowing the soil’. That still is one of the meanings or ‘culture’. You know
‘agriculture’ and ‘cultivated soil’. Also the product of the cultivation is ‘a
culture’, varying from micro-organisms to roses. The culture of roses is about
growing a certain type of rose. The distinguished characteristics of that rose
are developed, improved.
This is leading us to the other meaning of ‘a culture’. Now it isn’t
about flowers, but people. In ‘a culture’ they develop distinguished
characteristics. The people in a group all have a certain behaviour. They
develop the same values, tradition, rituals, a lifestyle. And this leads to a
style of building, clothes, food, music, etcetera.
Now we arrived at the meaning of ‘culture’. Cultural expression:
everything characterising humans, or a group of humans, a sub-culture. In fact
that is everything except nature. It can be architecture, fashion (clothing), food,
music, fine arts, theatre, etiquette, traditions, and many more.
By mentioning ‘art and culture’ in the same breath the aspect of ‘art’
is widened to ‘all art’. But the aspect of ‘culture’ is narrowed to only that
part having to do with art.
So at one side ‘culture’ is something that makes groups of people differ
from each other, at the other side it’s about what they have in common. It can
be restriction, or development.
a product of culture: a rose
*Voortaan staat de Nederlandse tekst op een aparte pagina 'Nederlands (Dutch)'.
maandag 12 januari 2015
Creativity is a Gift
Creative
Create,
creation, creativity, creative thinking, being creative
'Creativity is a gift', coloured pencils in 'daily journal January 2015'*
Creating is not just ‘making’. An important aspect of creating is designing.
Someone can design a ‘creation’ and have it made by others, but is still the
‘creator’. Someone ‘thinking creative’ can have wonderful ideas … which are
impossible to execute. But these ideas – the thoughts – are created!
It’s my conviction every human has some creativity. I base it on Genesis
1:27 (the bible). There it says God created humans ‘in His image’. God is the
Designer and Creator of all there is. We are ‘in His image’, so we are
designers and creators too. It’s a spiritual (mental) ability, because God is a
spirit. So every human is able to think creative.
The ability to be creative does not show in every person. Many people
never learned to use their creativity. Maybe they weren’t stimulated to think
by themselves. Maybe their toys were unimaginative and the TV was their nanny.
So their creativity was smothered.
When there are no materials, creative children can find a way to execute
their creative ideas. With sand, sticks and stones children can create
beautiful things! If parents tell them to stop otherwise they will become dirty
… they oppose their creativity!
If parents don’t give their children materials to colour and potter with
‘until they’re the right age’… their children might never have ‘the right age’.
As soon as a child can hold something in its hand, it’s able to create. Sure,
parents have to give a little ‘direction’, or the child will create anywhere:
on the wall, the carpet, the table-cloth, etc. All direction needed is: giving
a large tough piece of paper (f.e. wallpaper) and keep an eye on it, the
crayons are used only on that paper (b.t.w. wax crayons are the best for the
hands of toddlers).
But … you aren’t a toddler anymore. You have a history. In the past you
might not be stimulated to show your creativity. You never have any ideas and
you can’t even draw a stick-figure … Do not worry!
'Begonia rex', sketch using cheap felt pens on cheap printing paper
As I said there’s creativity in every human. So you have it in you.
Maybe it’s hidden very deep inside. But you can ‘draw it up’. You can learn to
surface your inner creativity. I mean real creativity, the ability to develop
an idea, to design and create something. Of course it isn’t there in a wink of
an eye … Take your time.
First think: what would you like to do? That’s personal. Some people
want to paint, others to write poems and others to plant a beautiful garden. These
are all creative activities. But you need more than only creativity, you need
to learn and practice skills.
You know what’s funny? When you start learning the skills … the creative
ideas will follow. After all you had them in you, spiritually! While you’re
busy learning the needed skills, the ideas will find a ‘way’ to surface. So you
can search for a course to learn something you like to do. You’ll notice: the
more you’re busy doing what you like, the more creative ideas will surface!
Creatief
Creëren,
creatie, creativiteit, creatief denken, creatief zijn
Creëren betekent:
scheppen. Scheppen is niet zomaar ‘maken’. Een belangrijk aspect van scheppen
is het bedenken of ontwerpen. Iemand die een ‘creatie’ ontwerpt kan die zelfs
door anderen laten maken, maar is toch de schepper ervan. Iemand kan ‘creatief
denken’ en zo tot heel aparte ideeën komen … die misschien niet uitvoerbaar
zijn. Toch zijn die ideeën -de gedachten- dan wel gecreëerd!
Het is mijn overtuiging dat ieder
mens creativiteit in zich heeft. Dat baseer ik op Genesis 1:27 (de bijbel).
Daar staat namelijk dat God de mens schiep ‘naar Zijn beeld’. God is de Ontwerper
en Schepper van alles wat er is. Als wij ‘naar Zijn beeld’ zijn, dan zijn wij
ook ontwerpers, scheppers. Het gaat dan om het geestelijke vermogen, want God
is een geestelijk wezen. Ieder mens heeft dus het vermogen in zich om creatief
te denken.
Dat vermogen tot creativiteit
komt er echter niet bij ieder mens uit. Veel mensen hebben nooit geleerd om hun
creativiteit te gebruiken. Misschien werden ze als kind niet gestimuleerd om
zelf dingen te bedenken. Misschien hadden ze fantasieloze speeltjes en werden
ze al heel jong voor de TV gezet. Daardoor wordt creativiteit al in de kiem
gesmoord.
Als er geen materialen zijn, dan
bedenkt een creatief kind wel een manier om toch z’n creatieve ideeën uit te
voeren. Kinderen kunnen met zand, stokjes en steentjes prachtige dingen maken!
Als de ouders dat echter verbieden, omdat het kind er vies van wordt … dan
werken ze de creativiteit tegen!
Als ouders wachten met het geven
van kleur- en knutselmaterialen ‘totdat het kind er aan toe is’ … dan komt het
kind er misschien nooit aan toe. Zodra een kind iets met z’n handje kan
vasthouden is het in staat zich creatief te uiten. De ouders moeten dat wel een
beetje ‘sturen’, anders uit het kind z’n creativiteit overal op: de muur, de
vloerbedekking, het tafelkleed, enz. Maar dat ‘sturen’ hoeft niet verder te
gaan dan een flink stevig stuk papier (bijvoorbeeld behangpapier) te geven en
er op te letten dat kleurkrijtjes alleen daarop gebruikt worden (dikke
kleurkrijtjes zijn heel geschikt voor kleine peuterhandjes).
Maar … jij bent geen klein kind
meer. Je hebt al een heel verleden achter je. In dat verleden ben je misschien
helemaal niet gestimuleerd om je creatief te uiten! Je weet niets te bedenken
en je kunt nog geen poppetje tekenen … Niet getreurd!
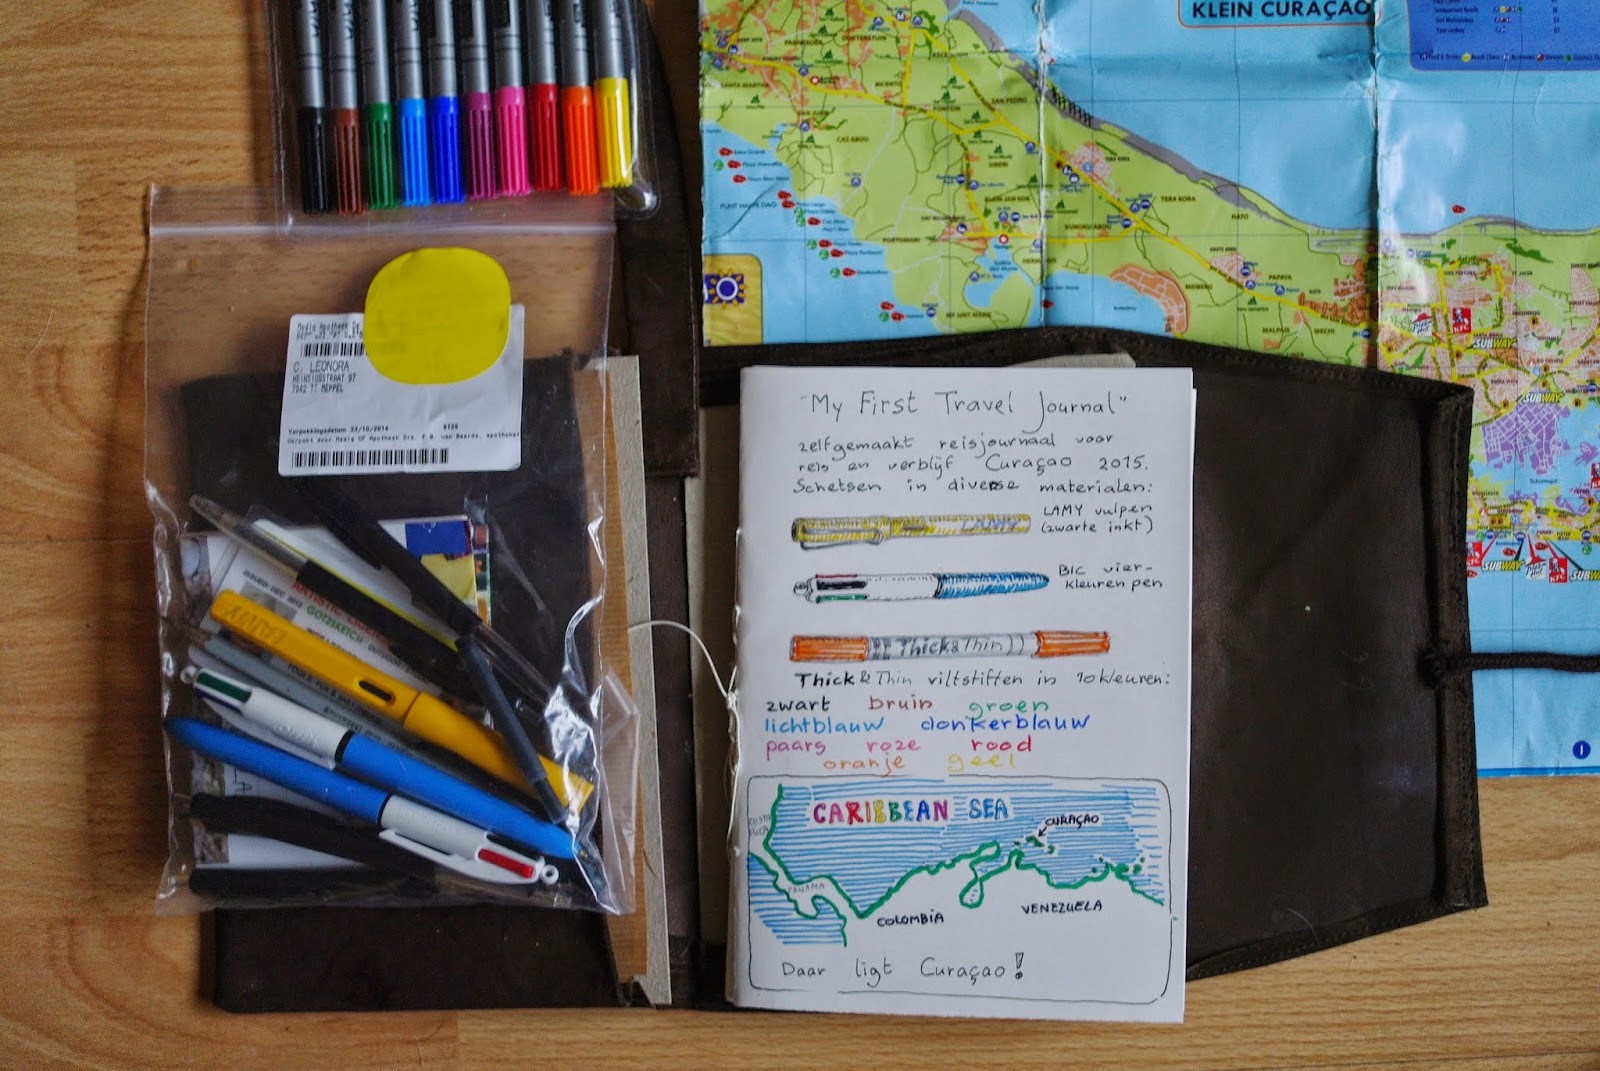
Zelfgemaakt 'reisjournaal' (travel journal) met suède omslag
Zoals ik al zei zit creativiteit
in ieder mens. Dus ook jij hebt het in je. Misschien zit het heel diep
weggestopt. Maar je kunt het ‘ophalen’. Je kunt leren de creativiteit die jij
in je hebt, te uiten. Echte creativiteit bedoel ik, het vermogen om zelf iets
te bedenken en dat uit te voeren. Natuurlijk kun je dat niet zomaar ineens …
Neem er de tijd voor.
Bedenk eerst wat jij leuk zou
vinden om te doen. Dat is heel persoonlijk. Er zijn mensen die willen
schilderen, terwijl anderen gedichten willen schrijven en weer anderen een
mooie tuin willen aanleggen. Dat zijn allemaal activiteiten waarbij je
creativiteit goed kunt gebruiken. Maar je hebt meer nodig dan alleen creatieve
ideeën, je moet ook vaardigheden aanleren.
Weet je wat zo leuk is: als je
begint de vaardigheden aan te leren … dan komen de creatieve ideeën ook wel.
Die zaten tenslotte al in je geest! Doordat je bezig bent met de vaardigheden,
vinden de ideeën een ‘weg’ om tevoorschijn te komen. Ga dus gewoon een cursus
volgen om iets te leren dat jou leuk lijkt! Je zult merken: hoe meer je bezig
bent met wat je leuk vindt, hoe meer creatieve ideeën er in je op komen!
Een schets van Van Gogh als voorbeeld voor mijn schets in 'daily journal January 2015'*
* ideas (prompts) for daily journal sketches in January 2015 I found here:
ideeën voor dagelijkse schetsen in januari 2015 vond ik hier:
zaterdag 20 december 2014
Watercolour pencils, how to use them?
(De Nederlandse versie van deze blog staat op http://lovefordrawing.wordpress.com/inge-leonora-den-ouden-aquarelpotloden/ )
Probably you know about watercolour pencils. They’re pencils of which
the colour is soluble in water. You make a drawing, put on some water … and it
looks like watercolour! Sounds easy … but is it really? What do you have to
know to do it yourself?
Don’t buy a cheap box of watercolour pencils in a supermarket! The cheap
stuff is of bad quality, not nice to work with. Good pencils the special store
for artist materials sells the piece. You can take some colours you like to
start with. Later on you buy some more. I use Caran d’Ache Supracolor Soft.
There are more good brands. The shop owner can advise you.
When you have your pencils, test them. Draw squares on a piece of
watercolour paper. Colour in two squares side by side in one colour. Make the
colour go from light to fierce and back again. Then you take water, dip a small
watercolour brush in, and work over one square only. The other square stays
dry. Start at the light part and work towards the part with more colour,
enforcing the flowing effect.
You do this with all of your colours. You’ll remark they don’t all react
the same to water. Now you’ve done this test you can take account with that.
Test of my watercolour pencils
The right paper is important too. You use water, so ordinary drawing
paper isn’t right. Use strong watercolour paper. You can buy it in the same
shop as the pencils. Ask for a brand of paper that can handle all layers of
pencils and water. There is ‘rough’ and ‘smooth’ paper. You could try both to
see the difference.
Nu we start drawing! You draw with watercolour pencils, but the end
result can look like a (watercolour) painting.
First you do the ‘lay-out’ (or ‘sketch’). You mark the setting of all parts of the drawing on the paper. I use watercolour pencils to do that. I draw the lay-out in a neutral colour (grey or brownish), or in the colours I’ll use in the drawing. This lay-out will be invisible at the end.
I draw from photos or from my imagination. Often I first sketch the
subject in pencil or pen on printer paper. So I get acquainted with shapes and sizes
of my subject. When I use a reference photo I measure accurately before putting
shapes on my watercolour paper. I don’t use a ‘grid’, I use a ruler to measure.
If you want to use a grid, draw it very lightly in graphite pencil, erase it
when the lay-out in watercolour pencil is ready. You can’t erase watercolour
pencils.
Children portrait, lay-out in watercolour pencils
I explain the way I work. You do not need to work the same way. There
are so many methods for drawing! Do it the way you like.
I often start in ‘shadow colours’. That’s not easy to explain. I analyse
the colour I will put on. Maybe it looks like brown … but it’s a shadow of a
reddish colour … I won’t take a brown pencil. I might start with a dark green.
When I go over the green with the reddish colour, they both mix and become
brownish. If it still doesn’t look the way I want, I put on more colour(s).
It’s more like ‘feeling the right colours to use’. When I’m drawing from
imagination it’s all ‘feeling’.
In this way I colour all of the drawing in one or more layers. Only
white parts have no colour (nor white pencil).
Children portrait, first coloured layer after first wash with
water
The first layer of colour is not fierce. First I ‘wash’ my drawing with
water. I use a small watercolour brush. In the test I wrote how to do it. For
every new shape I rinse my brush in water. Some shapes have flowing colours and
I want to enforce that. In that case I put a lot of water on my brush and work
on until that shape is finished. If that isn’t possible, I take new water on my
brush and go on in the wet part where I was before.
In a portrait I often want a nice flow from white to colour. Then I
start with my wet brush in the white and work over to the coloured part.
When all of the drawing is washed with water, it has to dry thoroughly.
If you go on with watercolour pencils when the paper is still wet, you’ll get
unexpected effects … Maybe that is what you want … the explanation comes later.
A day (or more) later I go on. If I see some change in shapes is needed,
it’s still possible, the colours are still light now. In the following layers I
make the colours stronger, more fierce. Sometimes I add more layers of the same
colour, but often I work over in different colours.
Children portrait, end result
You can add a texture in parts of your drawing. You use small lines, or
other doodles, to get that texture. These texture lines you make with more pressure
on the pencil, in the first layer. I often use a ‘shadow colour’. When you
brush it with water, more colour will stay in the lines, and less in the parts between.
In the next layer you put colour all over. After the wash then, a darker
mixture will stay in the lines. This is a way to draw fur, hairs, etc. Use
smooth watercolour paper, because rough paper has a texture of its own.
Illustration from my imagination, first layer: texture in the
kitten’s fur
Illustration with kitten, end result
As I said, there are many different ways to work with watercolour
pencils. I’ll tell a little about two of those.
You put lines, dots, shapes on your paper and you want them to stay
right there where you put them? So you won’t use a brush; the brush moves the
colours a little from their original place. I use a spray bottle then. The
drawing is flat on the table and I spray a mist of clean water over it. The
drawing stays in place until it’s dry. The water changes ‘pencil’ into ‘paint’,
but the drawing will stay as it was.
You want unexpected effects? Make your paper all very wet and start
drawing with watercolour pencils. When the core of the pencil is really wet you
can even ‘paint’ with it! Just try this!
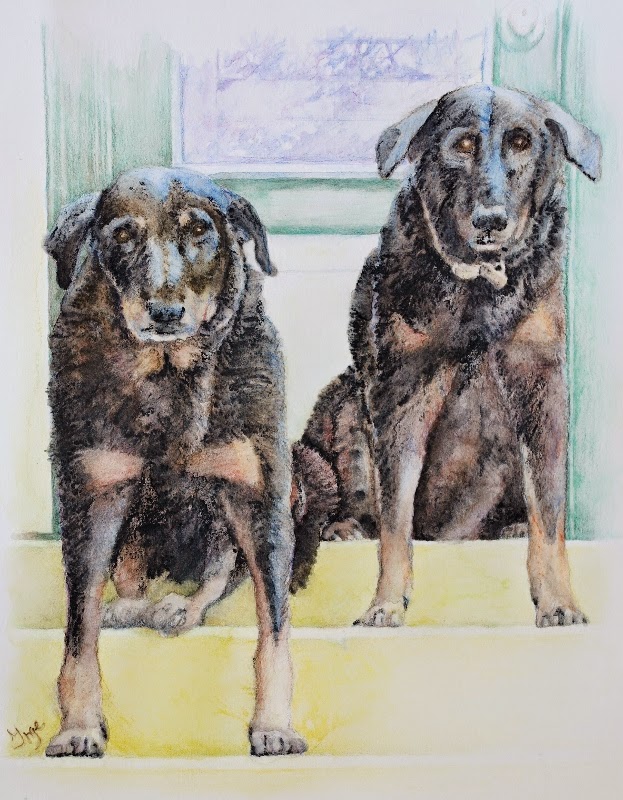
Two dogs, added more black at last with wet black watercolour
pencil
donderdag 6 november 2014
'ordinary' birds / 'gewone' vogeltjes
In onze tuinen komen allerlei vogeltjes. Als we in de tuin
werken, als we zaad voor ze neerleggen, dan zien we ze, vooral als er bomen en
struiken staan. Het lijken zulke gewone beestjes. Maar bekijk ze eens goed!
Zijn ze niet prachtig gekleurd? Neem nou het pimpelmeesje. Helderblauw op z’n
kopje, een donkerder tint op z’n rug en fel geel van voren, alles afgezet met
witte randjes. En dan het roodborstje, een zeer geliefd vogeltje. Eerst hoor je
z’n liedje, maar zie je ‘m nog niet. Dan komt er beweging in een struik … je
ziet wat … ja, een onopvallende groenbruinige vogel. Plotseling draait hij zich
om en zie je die knallende oranje borst! Geweldig toch?!
'I'm blue' (Blue Tit / pimpelmeesje)
In our
gardens are all kinds of birds. When we’re gardening, or feed them some seeds,
we see them, especially when there are trees and shrubs. They seem so ordinary.
But look better! Aren’t their colours beautiful? Look at the Blue Tit. Bright
blue its head, a darker hue its back and lemon yellow on his breast, all with
white rims. Or the Robin, a well beloved bird. First you hear its song, but you
don’t see him. Then there’s movement in the bushes … yes you see … an
inconspicuous greenbrownish bird. Suddenly it turns and then you see its
popping orange breast! Isn’t it great?!
Robin / roodborstje
Ruim een jaar geleden besloot ik, die ‘gewone’ vogeltjes te
gaan tekenen. Met kleurpotloden zou ik hun kleurigheid extra nadruk geven. Ik
had op internet al een aantal voorbeelden gezien van tekeningen op getint papier.
Dat leek me ook wel wat. Getint (licht gekleurd) papier heeft een paar
voordelen: wit komt er extra mooi op uit en als je de juiste tint kiest dan
hoef je sommige delen niet, of maar heel summier, te kleuren.
'Colourful acrobat' (Rosebreasted nuthatch / boomklever)
A little
over a year ago I decided to start drawing these ‘ordinary’ birds. In colour
pencils I wanted to accentuate their colourfulness. I saw some examples on
internet of drawings on tinted paper. I thought that would be nice. Tinted
(lightly coloured) paper has some advantages: white shows better and, when you
choose the right tint of paper, you barely have to put any colour on some parts
of it.
'Highest note' (wren / winterkoninkje)
In mei 2014 had ik vier van deze tekeningen af. Ik liet ze
inlijsten en nam ze mee naar kunstmarkten. Op ‘Art Explosion’ in Assen heb ik
er eentje verkocht, de koolmees. Het roodborstje heb ik later gemaakt en vult
de serie nu weer aan tot vier. Maar ik ga natuurlijk verder … er zijn nog zo
veel leuke vogeltjes te zien!
Met dank aan Marianne van ‘De Vogelkijker’ blog. Zij heeft de foto’s gemaakt die ik als voorbeeld gebruikte. Alleen het pimpelmeesje is van Paul Sawford.
'Neat with his tie' (Great Tit / koolmees)
May 2014 I
had finished four of these drawings. I had them framed and took them to art
fairs. At ‘Art Explosion’ in Assen I sold one, the Great Tit. The Robin I made
more recently, so now there are four again. But of course I go on … there are still so many nice birds!
I want to thank Marianne of the blog ‘De Vogelkijker’. She made the reference photos. Only the Blue Tit photo is made by Paul Sawford.
vrijdag 19 september 2014
Creative genes / Creatieve genen
People say
I am talented. Talent is something you’re born with. Some say when you have a
talent for art, you can make art without effort. I don’t think that is true.
Even when you’re born with a talent, you need to practice a lot to make good
use of your talent. A good work of art always takes time and effort.
I do
believe you can be born with a ‘disposition’ for art. Some families have more
creative or artistic members than others. That’s the case in my family. My
younger sister and I are very creative since childhood. We went in different
directions, she makes quilting and patchwork, while I do drawing and painting.
But as teenage girls we both tried out almost every creative technique.
My
grandmother (my father’s mother) was always busy. She knitted for every
grandchild, and she made embroidery. Her father (I never met, but heard of him)
was an architect. It is clear the ‘creative genes’ were in my father’s family.
But my father himself … he was an electro technical engineer! The only things I
saw him draw, were technical systems.
My father
died of cancer in 1983. Then I saw his watercolour travel kit. Did he paint
watercolours? Yes, he did! But, my mother told, he started watercolouring some
years before his death. That was after I had left home. She showed me a little
book from their vacation in Norway. It was like an ‘artist journal’: some
writing with watercolour illustrations made by my father.
I inherited
the watercolour travel kit. I started painting with it. It took many years
before I had the courage to do it outdoors like my father did.
Last year
my mother showed another treasure: some sketchbooks of my father. These were of
much earlier date. The sketches were from before their marriage. Also in those years my father took a sketchbook with
him on vacation. He made quick sketches in pencil, or with a match stick and
Indian ink. Nowadays on social media there are groups for ‘urban sketching’,
‘artist’s journaling’, etc. Without internet my father did the same in the
early 1950’s! I am thankful for this inheritance I got from him!
Mensen zeggen dat ik talent heb. Met talent word je geboren.
Ze beweren soms: als je talent hebt voor kunst, dan maak je moeiteloos kunstwerken.
Dat is volgens mij niet waar. Al ben je met talent geboren, je moet toch
veel oefenen om dat talent goed te kunnen gebruiken. Goede kunstwerken kosten
altijd tijd en moeite.
Ik geloof wel dat je geboren kan worden met ‘aanleg’ voor
kunst. Sommige families hebben meer creatieve of artistieke leden dan andere.
Dat is zo in mijn familie. Mijn jongere zus en ik zijn van jongs af erg
creatief. We gingen verschillende richtingen uit, zij maakt patchwork en
quilts, ik teken en schilder. Maar als tieners hebben we allebei allerlei
creatieve technieken uitgeprobeerd.
Mijn oma (de moeder van mijn vader) was altijd bezig. Ze
breide voor alle kleinkinderen en ze borduurde. Haar vader (ik heb hem niet gekend,
alleen over gehoord) was architect. Het is duidelijk dat de ‘creatieve genen’
in mijn vader’s familie zaten. Maar mijn vader zelf … was elektrotechnisch
ingenieur! Ik heb hem alleen maar technische tekeningen zien maken.
Mijn vader stierf in 1983 aan kanker. Toen zag ik zijn
aquarelset. Maakte hij aquarels? Jawel! Maar mijn moeder vertelde dat hij
daarmee pas was begonnen in zijn laatste jaren. Toen was ik al het huis uit. Ze
liet me een boekje zien van hun vakantie in Noorwegen. Dat was net als een
‘artist’s journal’: geschreven stukjes met geaquarelleerde illustraties door
mijn vader.
Ik erfde mijn vader’s aquareldoosje. Ik ging ermee
schilderen. Het heeft wel jaren geduurd voordat ik ook buiten durfde te
schilderen, zoals mijn vader.
Vorig jaar liet mijn moeder een andere schat zien:
schetsboeken van mijn vader. Die waren van nog veel langer geleden. De schetsen
waren van voor hun trouwen. Toen nam
hij ook een schetsboek mee op vakantie. Hij maakte schetsjes in potlood, of met
een luciferhoutje en Oost-Indische inkt. Tegenwoordig zijn er op de sociale
media groepen voor ‘urban sketching’, ‘artist’s journals’, enz. Zonder internet
deed mijn vader dat al in de jaren ’50! Ik ben heel dankbaar dat ik dit van hem
geërfd heb! donderdag 10 juli 2014
Sorry
Sorry I
didn’t write anything for my blog last month. There is no excuse. I did not
feel like writing a blog-post. That’s all. There was plenty to write about.
I could
write about my husband in hospital. Doctor visits, researches, operations,
medication, etc. While he stayed in hospital (some weeks, again some weeks,
then again some days) there were new subjects for sketches. Sketches of my
husband in a hospital bed:
Sorry dat ik vorige maand niets in mijn blog heb geschreven.
Ik heb er geen goede reden voor. Ik had geen zin om een blog-post te schrijven.
Dat was alles. Er was genoeg om over te schrijven.
Ik had kunnen schrijven over mijn man in het ziekenhuis. Artsen,
onderzoeken, operaties, medicijnen, enz. Terwijl hij in het ziekenhuis lag (een
paar weken, latere nog een paar weken, en nog een paar dagen) waren er genoeg onderwerpen
om te schetsen. Zoals mijn man in het ziekenhuisbed:
Carlos (my husband) asleep in the hospital, sketch in soft pencil
Carlos (mijn man) doet een dutje in het ziekenhuis, schets met zacht potlood
Sketches of
the view from the hospital window:
Schetsen van het uitzicht uit het raam van het ziekenhuis:
view from the hospital in Meppel, sketch in black BIC ballpoint
Uitzicht vanuit het ziekenhuis in Meppel, schets met zwarte BIC balpen
When he
went to the other hospital, the UMCG in Groningen (University Medical Centre,
for more research), I sketched in that city:
Toen hij naar het andere ziekenhuis ging, het UMCG in
Groningen, voor nader onderzoek, toen schetste ik in die stad:
sketches in the train to Groningen (from imagination)
and at the walk along a canal in Groningen, all page in 4-coloured BIC ballpoint
schetsen in de trein naar Groningen (fantasie)
en tijdens wandeling langs gracht in Groningen, bladzijde in BIC vierkleurenbalpen
and at the walk along a canal in Groningen, all page in 4-coloured BIC ballpoint
schetsen in de trein naar Groningen (fantasie)
en tijdens wandeling langs gracht in Groningen, bladzijde in BIC vierkleurenbalpen
At home I
spent a lot of time writing and illustrating children’s stories for three
different contests. About that part I will write later. There was time for some
more elaborate sketches too:
Thuis besteedde ik veel tijd aan het schrijven en
illustreren van kinderverhalen, voor drie verschillende wedstrijden. Daarover
schrijf ik later wel. Er was ook tijd voor meer uitgewerkte schetsen:
rose, drawing in soft pencil and pencil eraser
roos, getekend met zacht potlood en potloodgum
cat's eye, from a photo in a newspaper, drawing in black BIC ballpoint
oog van een kat, naar foto uit een krant, tekening in zwarte BIC balpen
vrijdag 2 mei 2014
uitstapje naar Amsterdam / little trip to Amsterdam
Ik had een schilderij gemaakt voor iemand in Amsterdam. Ik dacht: 'ik breng het zelf naar haar toe, dan kan ik daarna eens in Amsterdam rondkijken'. Zo gedacht, zo gedaan. Het bleek een dag te zijn waarop heel veel mensen een dagje met de trein naar Amsterdam wilden. Toch was 30 april nu geen koninginnedag meer!
Ik kwam tegenover een echtpaar te zitten dat ook voor het eerst na vele jaren weer eens naar Amsterdam ging. Spraakzame mensen, afkomstig uit 'het hoge noorden', met een biologisch melkveebedrijf. Dat is natuurlijk een interessant gespreksonderwerp! Zij vonden het ook interessant dat ik schilderijen maakte.
Aangekomen in Amsterdam even met de tram en op zoek naar het adres van mijn opdrachtgeefster. Ze ontving me vriendelijk, bood me thee en brood met kaas aan. Ze vroeg me ook raad over het laten inlijsten van een paar andere schilderijen. Het was gezellig, maar ik wou meer van de stad zien.
Omdat haar adres vrij dicht bij het centrum was ging ik van daaraf wandelen. Ik had naar een museum kunnen gaan, maar dat was toch zonde met zulk mooi weer! Ik liep dus, dan weer een straat naar links en dan weer naar rechts, zonder duidelijk doel. Zo wandel ik vaker, het is me nog steeds niet gelukt om te verdwalen …
Nadat ik een brug over was gegaan zag ik op een hoek een kleine supermarkt. Ik besloot daar wat drinken te kopen. Ik kocht ook een bak tomaatjes en een zak krentenbollen. Ik liep even een straatje verder, een hoek om, en kwam in een rustige klein parkje. Daar at en dronk ik iets. Tussen wat gebouwen door zag ik water, met daar achter marktkramen. Ik dacht: 'misschien is daar wel het Waterlooplein'. Ik liep die kant op. Het uitzicht langs het water, met bootjes en een brug, vond ik wel een schets waardig. Zie hier die schets (links):
Toen ik net was opgestaan en mijn schetsspullen had ingepakt, kwam er een grote eend met een aantal jonkies aan. Ik maakte direct wat foto's, zo ver mogelijk ingezoomd. Deze vind ik wel redelijk gelukt:
Daarna liep ik de brug over, naar de markt. Dit bleek niet het Waterlooplein te zijn, maar de Dappermarkt. Ik sloeg af in de richting van een andere brug. Toen ik die over was bleek ik dicht bij Artis te zijn uitgekomen. Door het hek heen kon ik leuk 'apies kijken' (die 'apies' waren de bezoekers, van de dieren zag ik alleen vogels).
Verder kon ik wegwijzers volgen richting Centraal Station. Ik moest tenslotte toch ooit weer terug. Het werd steeds drukker, ik was duidelijk in het centrum. In een winkelstraat werd mijn aandacht getrokken door een tweedehands kledingwinkel met de naam KILO. Daar werden kleding, schoenen en accessoires per kilo verkocht! Maar helaas vond ik er niet het leuke jurkje of bloesje dat ik nog nodig had (althans niet in de goede maat). Deze winkel bleek helemaal door te lopen naar het plein er achter. Dat was uiteindelijk toch het Waterlooplein! Maar nu werd het te laat om daar te gaan snuffelen. Ik kwam langs een koffiezaak die mij aantrok. Ik houd niet van bruine café's, de Coffee Company is precies het tegenovergestelde daarvan: lekker ruim en modern, met grote ramen, een lange aanschuiftafel èn een loungehoek (en boven knusse hoekjes voor de liefhebbers). Lekkere espresso hebben ze er ook.
Ik dronk mijn espresso en wat water uit de kan op tafel (geweldig, die service!). Toen ging ik vlug weer verder, de hoek om terug naar de straat waar ik vandaan kwam. Net over een brug zag ik zo'n leuk hoekje met grachtjes, daar moest ik toch even kijken. Daar fotografeerde ik dit zeer Amsterdamse tafereeltje:
Aan het eind van dat grachtje kwam ik weer bij een andere gracht uit. Rechtsaf moest hier de goede richting zijn. In de grachtenpanden waren allerlei interessante winkels, maar ik had weinig tijd (en geld …). Toch ging ik even een kijkje nemen in een klein winkeltje in 'hand made' kleding, kussens, e.d. Ik sprak even met de eigenares, die zelf alles ontwerpt en samen met twee assistentes maakt. Leuk, dat zulke winkeltjes kunnen bestaan!
Het spoor kwam al snel daarna in zicht. Ik zette de pas erin om vlug bij het station te zijn. Toen ik daar was, in de prachtig gerenoveerde hal, nam ik een gratis blad mee over de verbouwing. In dat blad stond o.a. deze luchtfoto van Amsterdam Centraal Station en stationsplein:
De eerste trein in de goede richting zou de sprinter naar Zwolle zijn. Ik had net even gewacht -en nog een krentenbol opgegeten- toen die er al aan kwam. Ik ging er lekker in zitten, hoewel de vertrektijd pas over een minuut of tien zou zijn. Gelukkig maar! Steeds meer en meer mensen kwamen de trein in. Dat ging door tot er geen enkel plekje meer over was. De laatste passagiers stonden tegen elkaar aan gepropt! Ik vond het wel grappig om hiervan een klein schetsje te maken (zie eerste foto, rechts).
Dan sluit ik hiermee af. Ik heb echt genoten van dit dagje uit!
For those who can't read Dutch: I hope you enjoy my sketches and photos of Amsterdam. This time no translation, sorry.
Abonneren op:
Posts (Atom)